Why Backups Are Important

- Hard Drives Crash — Even though solid state drives, don’t have moving parts like disc drives, they can still fail.
- Computers can get stolen — especially if you travel
- Operating system (OS) updates can corrupt or delete your files.
I feel so sad when I see clients who are devastated because they didn’t realize how important their data was until it was gone.
Think about all of the files on your computer. Do you have an address book, irreplaceable photos or videos, music or movies you’ve purchased, important letters, legal documents, or medical records? What would you do if they disappeared or were corrupted due to a hardware or failure or software glitch?
When you have a backups, you can easily restore your files from your backup.
The Ultimate Backup Plan
Follow the 3, 2 , 1 rule
- 3 backups
- 2 different types
- 1 off-site
If you have important files and photos and don’t want to risk losing them, this is the way to go. With my Chromebook, I store everything in Google Drive and trust Google not to lose my stuff but you may not be as trusting. With my PC, I use and external backup as well as Google backup and sync. Another option would be to use Microsoft’s One Drive cloud plus an external backup. This plan qualifies as “2 different types” and “1 off-site” but it’s only “2 backups.” Decide on a plan that makes you comfortable but DECIDE and IMPLEMENT!
Off-Site (Cloud Storage)

Google Drive, OneDrive, iCloud, Dropbox and other cloud services, enable you to store your files off site on their computers, but they are not doing continuous backups as you work and you have to make sure that your files get saved to the right location.
Continuous Backup Inside Software
Software programs, like Word or Excel can be set to update continually as you work but they may not be set up to do this by default. You may need to adjust the settings. Google docs does continuous backups automatically! This protection assumes that your document file is connected to a cloud service. It doesn’t do any good to have your document updating as you work on it, if it’s stored on your computer and your computer drive crashes.
Subscription Cloud Backup Services
Another solution is to pay for a service like Carbonite, Backblaze, or iDrive. These services backup all the changes in all applications as they occur. You set up an account and then download an app that synchronizes your files between your computer and their servers. They provide ample storage space with the basic fee and you can always increase the capacity if you need more storage. (Services and fees change all the time, so search on the internet thewirecutter.com or call me for help.)
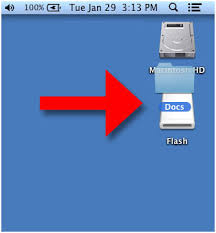
External Drive Backups

External drive backups provide a safety net in case an online/cloud backup should fail. It’s unlikely that an online backup system would fail, but you never know for sure.
Your external drive backup should be set up to work continually in the background. If you only use scheduled backups, you can lose changes made between scheduled backups. For example: If you create a document on Friday, your computer doesn’t back up until Sunday, and your computer crashes on Saturday, you will loose the document created on Friday.
A disadvantage to external drive backups is that they can crash just like any other drive they can get stolen, or damaged by a fire or natural disaster.
Again, in order for your files to be completely safe, you should use more than just an external drive backup. Remember the 3 – 2 – 1 rule.
How To Set Up Backups With Microsoft Windows

For Windows 8 and 10 Use File History
File History automatically backs up your files every hour by default, but you can choose every 10 minutes, 15 minutes, 20 minutes, 30 minutes, 1 hour, 3 hours, 6 hours, 12 hours, or once per day.
It will be set to keep your backups forever, unless you change it to 3 months, 6 months, 9 months, 1 year, or 2 years old. You can also have it automatically delete backups as necessary to make space on your drive.
- Connect an external hard drive to your computer using a USB port.
- Open the Settings app or Control Panel from your Start menu.
- Navigate to Update & Security > Backup.
- Click Add a Drive and select the drive.
- Select More options to choose how often to backup, how long to keep backup copies, and which files to back up.
Windows will backup your files to the drive, as long as it is connect it to your computer. If you move your laptop, be sure to remember to plug your drive in again.
For Windows 7:
- Go to the Control Panel
- click on System and Security
- click on Backup your Computer
- click Setup Backup
- click on the name of your external drive
- click Schedule to choose the day and time
- click Save Settings and Run Backup
Apple Computers

Use Time Machine
Time Machine keeps a day’s worth of hourly backups, a month’s worth of daily backups, and weekly backups until there’s no more space.
- Connect an external drive to your Mac and you’ll be asked if you want to configure it as a Time Machine drive
- Click Use as Backup Disk and Time Machine will automatically begin backing up everything
- Click the Time Machine icon on the menu bar and select Open Time Machine Preferences or open the System Settings window and click Time Machine to access its preferences window.
Enabling Time Machine on a MacBook will also enable the Local Snapshots feature. Your Mac will save a single daily snapshot as well as a single weekly snapshot of your files to its internal storage if the Time Machine backup drive isn’t available. This provides you with a way to recover deleted files or restore previous versions of files even if you’re away from your backup drive for a while.
Mobile devices
Tablets and smartphones have built-in auto-backup systems. Check in Settings to be sure the backup feature is turned on and that it has backed up recently.
Archiving Files

Files that you don’t intend to edit or view frequently, don’t need to be backed up continually and can be archived. You can move the files to an external storage device and store it offsite by giving it to family members or putting it in a safe deposit box at a bank. Consider making more than one copy and storing them in more than one location. This can save you money on cloud storage fees.
In Conclusion

Setting up backup systems is critically important but it’s also a simple matter of deciding on the systems you want to use and setting them up. Once your backup systems are in place, you only need to check occasionally to be sure they are working properly. (Just choosing your doctors and getting your regular checkups.)