Blog

  • 4 Simple Apple Computer Maintenance Tips

    Did you know that your computer needs some regular maintenance, just like your car?

    Just like your car, your computer is a substantial financial investment and causes major inconvenience when it doesn’t run properly so it’s important to keep it in good shape. In both cases, you can learn how to do the maintenance yourself, or you can pay someone to take care of it for you.

    If you don’t want to deal with it, I’ll be happy to take care of it for you…one time or on a monthly basis via remote connection.

    I hope you find this information helpful and that you will forward to others so they can more fully enjoy the benefits of computer technology.

    There are four simple maintenance tips that will help you keep your computer in tip-top shape and running at its best.:

    Run Apple Disk Utility1) Run Disk Utility

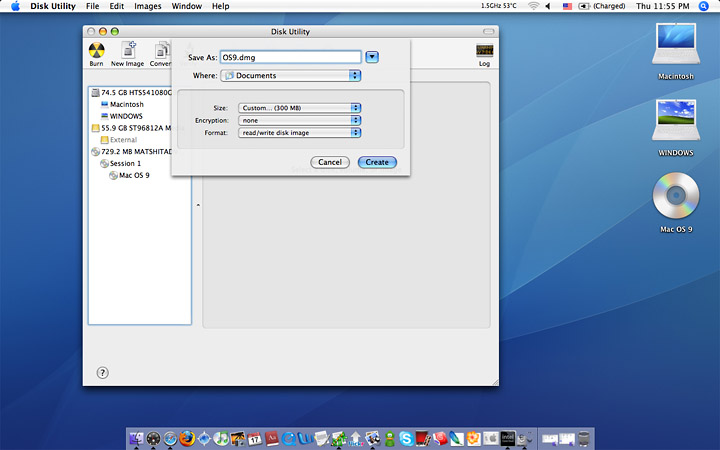
    Running Disk Utility every month or two is a good for: repairing permissions, and more importantly, verifying and repairing the hard drive.

    Disk Utility is included on all Macs and found in the /Applications/Utilities folder, under the “First Aid” tab and can be run one after another.

    Repairing permissions is a good procedure to run, especially after installing or uninstalling a lot of applications.

    Repair Disk s probably the most important thing to do with Disk Utility. Be sure to run Verify Disk not only on the drive itself (physical drive name), but also the boot partition (Macintosh HD). If any errors are found, they’ll appear in red, and thankfully Disk Utility is usually more than capable of handling such repairs on it’s own.

    The best way to repair the boot disk is to boot from the recovery partition by holding down Command+R and running Disk Utility from there. This will be necessary if bad blocks are found or if the drive is corrupt.

    Mac Software Update2) Keep your Mac Software Updated

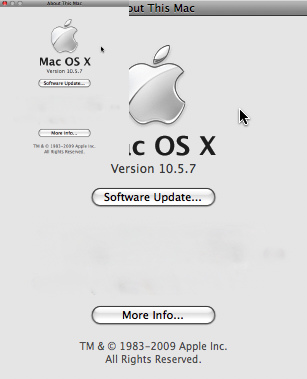
    Keeping your software up to date is vital. Periodically run Software Update from the Apple menu, and periodically check the Mac App Store for updates of your apps too.

    Updates contain bug fixes, feature enhancements, and security fixes. and it’s so easy to do there is no excuse not to.

    Software Update will check for updates once a week by default, but the Mac App Store has to be manually checked for updates in OS X Lion.

    With OS X Mountain Lion and newer, Software Update moves to the Mac App Store so this whole process will be automated for modern OS X users, including El Capitan, Yosemite, and Mavericks.

    Mac Desktop Clutter3) Clean Off the Desktop

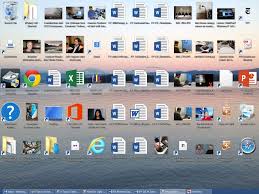
    Having a lot of files on the desktop will actually slow down your computer because each file and its icon preview take up RAM and resources.

    The less RAM you have the more you’ll notice the sluggishness resulting from a cluttered desktop.

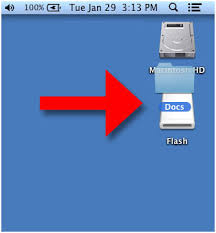
    It is more efficient to get in the habit of filing things into appropriate folders instead of on the desktop; but if you can’t be bothered to do that, just grab all the files and move them into the appropriate folders from time to time.

    If you can’t remember to do it yourself, there are apps that will automatically clean it for you by moving files and folders to a designated place at a regular interval.

    Set Up Time Machine4) Regularly Back Up Your Computer

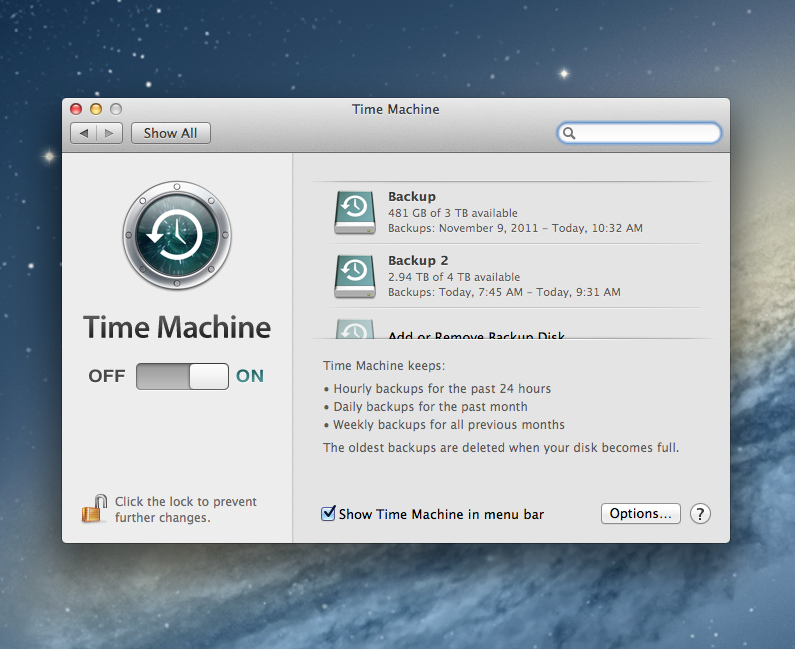
    Performing regular backups is essential for you to be able to quickly recover from potential disasters.

    The simplest back up solution for Macs is Time Machine. You’ll need an external hard drive, but once you set up Time Machine, automatic backups occur without any effort.

    If you haven’t set up Time Machine yet you really need to do so. Get a large external hard drive and configure Time Machine through System Preferences.  I’t’s easy to do and you’ll be very thankful you have a back up in the event of a hard drive failure.

    You should also do a manual back up before allowing system software updates. I’t’s rare, but things can go wrong, and it’s best to be prepared.

    “Listen to your Mother” and do your maintenance so you won’t have regrets later ; )

    Enjoy!

  • To Sleep or Shut Down, That is the Question

    When your computer is not in use, do you shut it down, put it to sleep, or just keep it turned on?

    In working with clients, it’s come to my attention that many people don’t completely shut down their computers from time to time.  Letting your computer just go to sleep night after night can cause problems.  For the average user, I recommend shutting it down completely, at least once a week.  The same applies to mobile gadgets like tablets and phones.  (See below for more details.)

    If any of your techie tools are acting a little weird and slowing down, they may just need a reboot (shutdown and restart).  Try rebooting and then call me if that doesn’t work.

    I hope you have found this tip useful and that you will forward it to others so they too, can more fully enjoy the benefits of computer technology.

    Pros and Cons

    Putting It To Sleep   Computer in sleep mode

    The advantage to putting it to sleep is that it provides the easiest and fastest way to resume work while minimizing wear and tear on the hardware. The computer goes to sleep instantly and when it wakes up, all of your open apps, documents, window arrangements, and web pages, are exactly where you left off with almost no delay. For average users who want to quickly get back to what they were doing, sleeping is perfect.

    • Pros: Quickly resume exactly where you left off; sleep and wake can be scheduled or even done remotely
    • Cons: Minor power consumption; system temp fluctuations, swap, and cache files don’t get cleared out during as during a reboot process; system updates requiring reboots don’t install automatically and need a manual reboot; performance is best for computers with 4GB RAM or more

    If you use your computer every day, simply putting it to sleep when it’s not in use or overnight is probably the best choice. Just be sure to reboot every once in awhile to allow system software updates to install. Waiting for an operating system Update or Security Update is generally a sufficient time between reboots.

    shutting down computer for updatesShutting It Down

    Shutting it down isn’t necessary unless it’s going into a longer term state of inactivity or storage. Shutting down is slower because all the open applications and documents have to quit; and when you turn the machine back on, everything has to re-open again to get back to where you were prior to shutdown.

    • Pros: Saves power, doesn’t strain hardware; system temp, memory, swap, and cache files get cleared out during boot; allows for major system updates to install
    • Cons: Takes a while to boot up and resume previous activity

    For the power conscious or for those trying to squeeze the absolute longest lifespan out of hardware and hard disks, shutting down when not in use is the best choice. This is also necessary if you’re going to put your computer in long term storage, won’t be using it for a longer than a few days, or you’re going to be traveling and not using it during the travel period.

    Computer as a serverKeeping It Always Turned On

    Leaving a computer constantly turned on is best reserved for computers that function as servers. On the plus side, you don’t have to bother resuming anything since it’s already on, you can schedule all maintenance and backup tasks to occur in the wee hours of system inactivity, and it allows for a server or media center to be running on the machine. The downside is the constant power consumption and the constantly active hardware, which can limit overall lifespans of the computer components.

    • Pros: No waiting for use; instantly resume all apps and tasks exactly where you left off; allows for servers to run with constant accessibility; backup and system maintenance tasks can be scheduled for off hours
    • Cons: Constant power consumption; more wear and tear on hard drives, fans, and physical hardware due to possible heat

    For the casual user, it’s best to put it to sleep when it’s not in use.  It gives hard drives and fans a rest, and will generally lead to a longer lifespan of the computer.

  • How to Use Flash Drives

    Some of my clients who use flash drives, have been at risk of losing their data because they needed to know a few important rules.  I hope you will find this information helpful and that you will share it with others so they can benefit too.  If you need a little tutoring to master this skill, just let me know.

    What is a Flash Drive?

    A flash drive, or USB flash drive, also known as memory stick, memory card, flash stick, keydrive, pendrive, thumbdrive and jumpdrive, is a data storage device that includes flash memory with an integrated Universal Serial Bus (USB) interface. USB flash drives are typically removable and rewritable.  They are physically much smaller and sturdier than CDs.

    The Rules

    1. Flash drives are NOT intended to be used for the backing up of data. They are a good means of transferring relatively small amounts of data from one computer to another or archiving data that will not be edited later such as photos.  For backing up important data, use a cloud backup service such as iDrive or Carbonite, or an external hard drive, or both.
    2. NEVER work on documents directly from your flash drive. It is best practice to first copy the document to your computer, make changes to the document from the local computer, and then copy the file back to the USB flash drive.
    3. If the flash drive is removed improperly or files are worked on directly from the flash drive, the files can become corrupted or lost. This is why it is important to follow all instructions carefully.

    To properly remove a flash drive from your computer

    1. Double-click the Remove hardware icon lower right hand corner.       Eject Media
    2. In the safely Remove Hardware window, Double-click on the “USB Mass Storage Device”
    3. In the Stop a Hardware device window, click on your USB flash drive
    4. Click OK
    5. After seeing the “Safe” statement, you can remove the flash drive from your machine.

    Safe to remove hardward screen shot

    On a Mac, right click, or for trackpad users hold down control and click on the drive at the same time to bring up the menu. Then click “eject”.

    flash drive on Mac Desktop

    How to copy files to a USB Flash drive from your Computer:

    1. Insert USB flash drive into any available USB port on your computer

    *Note: If the USB flash drive is being used for the first time, Windows may need extra time to install the hardware. You will know your flash drive is ready for use when you see a message by the clock stating: “Your new hardware has been installed and is ready for use.”

    1. Locate the file or folder on your computer that you would like to copy to the flash drive.
    2. Right-click the file
    3. Highlight “Send to”
    4. Select “Removable Disk (“Drive letter:)”

    On a Mac, the drive icon will appear on the desktop.  Locate your files in finder and drag and drop them onto the drive.

    After following the Steps above, Please DO NOT do not immediately remove the flash drive from the USB port. Follow the instructions under “Properly Removing Flash Drive from Computer:”

    Checking to Make Sure File was Copied to Flash Drive:

    1. Double-click My Computer
    2. Double-Click “Removable Disk (“Drive letter:)”
    3. The copied file or folder should appear on the removable disk. From here, it can be placed into a specific folder on the removable disk if desired. If the file is not there, retry the steps under “How to copy files to a USB Flash drive from your Computer:”

    On a Mac, double click the drive icon to see the files.

    After following the Steps above, DO NOT immediately remove the flash drive from the USB port. Follow the instructions under “Properly Removing Flash Drive from Computer:”

    How to Copy files from a USB Flash Drive to your Computer:

    1. Insert USB flash drive into any available USB port on your computer  (If the USB flash drive is being used for the first time, Windows may need extra time to install the hardware necessary for the USB drive to function properly. You will know your flash drive is ready for use when you see a message by the clock stating: “Your new hardware has been installed and is ready for use.”)
    2. Double-click My Computer
    3. Double-Click “Removable Disk (“Drive letter:)”
    4. Locate the file or folder on your flash drive that you would like to copy to your computer.
    5. Right-click the file
    6. Highlight “Send to”
    7. Select “My Documents”
    8. The copied file or folder should now appear on your computer under the “My Documents” folder. From here, it can be moved to any desired location on your machine. If the file or folder does not appear in the “My Documents” folder, retry the steps under “How to copy files from a USB Flash drive to your Computer:”

    On a Mac, locate the file on the flash drive and drag and drop on the Documents folder in Finder

    After following the Steps above, DO NOT immediately remove the flash drive from the USB port. Follow the instructions under “Properly Removing Flash Drive from Computer:”

  • See Your Computer on “The Big Screen”

    Have you ever wished you could see your computer screen on a TV?  Would you like to see emails, web pages, photos slideshows, YouTube videos and movies on a big screen or display presentations for your business?

    Well you can….and it can be pretty simple and inexpensive to set up.

    The simplest method is Chromecast because you don’t have to know about ports and screen resolution settings.

    chromeCast

    A $35 Chromecast plugs into the TV and connects it to your Wi-Fi network. Then you can see video, images and pages from the Chrome web browser from any computer, smartphone or tablet that’s also on the network.  This is a very inexpensive solution and very easy to set up.  You can use Chromecast with a Mac too.  You will just need to use the chrome browser instead of Safari when connected to the TV.

    If you want to see everything on your computer rather than just what’s shown in Google Chrome, you can do a direct connection.

    DIRECT CONNECTION

    There are four kinds of ports for direct connections.  HDMI, DisplayPort, DVI and VGA.

    All newer TVs have HDMI, and that’s the one you ideally want to use because it supports HD (high definition).

    Unfortunately, many computers don’t support HDMI

    Computers that don’t have HDMI, will have either DVI or DisplayPort. If your computer has one of these, you can get an adapter to connect it to the HDMI port on your TV.

    Inexpensive computers might have only VGA and it cannot do HD (high definition) images so you might want to use a better computer if you plan to stream movies online.

    GETTING THE RESOLUTION RIGHT

    Modern computers should be smart enough to figure out the right resolution, when you plug into a TV, especially if you’re using the HDMI port.

    However, if you’re using an adapter or an older version of Windows, it might have to adjust the resolution.

    Right-click on the computer desktop and select “Screen Resolution.” Select the TV and change the Resolution to 1920×1080 (unless you’re using a smaller or older TV, in which case it might be 1280×720).

    You might be tempted to push the resolution higher, but don’t. Not only will it look terrible but a higher resolution actually makes everything on the screen look smaller.

    video calls

    PICKING A TV SIZE 

    If you’re going to use a TV in a larger room, you want to make sure it’s easy to see. This handy chart will give you an idea of the size you’ll want based on the room length.

    Distance Minimum size Maximum size
    6 feet 24-inch screen 36-inch screen
    8 feet 32-inch screen 48-inch screen
    10 feet 40-inch screen 60-inch screen
    12 feet 48-inch screen 72-inch screen

    Even with a large TV, you might still have a hard time seeing smaller computer text from a distance. You can use CTRL + + (plus sign) in most programs to zoom in text and images. CTRL + – (minus sign) zooms back out, and CTRL + 0 (zero) resets the zoom. This is a great trick for watching on your regular computer monitor as well.

    CONTROLLING THE COMPUTER

    You can use a wired mouse and keyboard, but it’s more convenient to use a wireless mouse and keyboard so you can pass it around or give it to whomever is running a meeting in your office.

    Be sure everyone knows how to turn off the mouse when it isn’t in use so you don’t waste the batteries. For business use, you might keep several on hand so you don’t have to interrupt a meeting to change batteries.

    If you need help doing any of this, just call me for an appointment.  760-348-8867

    If you have found this information helpful, please share it with others and encourage them to contact me to receive my Techie Tips on a regular basis.

    Enjoy!

    Mardi

  • The True Meaning of the 4th of July

    A client sent me this today. I loved it and trust that you will too. Thank you to all who have served our country and especially to my special “wounded warriors” (you know who you are.) Enjoy!

  • Best Way To Backup Your Computer and Mobile Devices

    Cloud Computing Diagram

    Do you have a backup strategy for your computer and mobile devices in the event of a catastrophe?  Are you wondering about the easiest and least expensive way to do it?

    I recently received an email from a client with questions like these and I thought you would like to know my recommendations….

    “Is iDrive the best cloud storage company?  The cost is $45/year and it says it’s for all devices.  Is there a cloud storage system that automatically updates my iPhone and PC?  I pay Apple for extra storage and it still is not enough….and I have an external hard drive for my PC back-up.”

    External hard drives can fail just like internal hard drives and won’t do you any good if burned in a fire or stolen.  You still need to have a cloud backup.

    IDrive Online BackupI like iDrive the best.  The $45/yr. includes 1T (terabyte) of storage, which is more than enough for most people, and it includes backups of mobile devices.

    Carbonite is also good but doesn’t include mobile devices.  It’s 59.99 for unlimited backup.  So if you need lots of storage and don’t have a smartphone or tablet to back up, this would be the best option.

    It’s gets a little more complicated when you are using devices from two different companies, like an Apple phone and a Microsoft PC.  An iPhone backs up to iCloud but a PC doesn’t.

    If you have an Apple computer and an iPhone and/or iPad, everything backs up to iCloud.  Apple offers some inexpensive plans but if you need a lot of storage, it can get expensive.

    20 GB: $0.99/mo, 200 GB: $3.99/mo, 500 GB: $9.99/mo, 1 TB: $19.99/mo ($239.40/year)iCloud

    Many of my clients are complaining having to upgrade to more expensive iCloud storage plans.  This is usually because of their photos/videos or music collections.

    You can save money on iCloud storage by moving files to your PC and deleting them from iCloud but be sure have a backup plan for your your PC.

    If you aren’t making changes to photos or docs and you just want to archive them, you can slide them onto a flash drive and save money on cloud storage.  Be sure you have more than one copy.  Flash drives can get damaged or lost.  You might store copies with friends or relatives or in a safe deposit box.

    If you have an Android phone, Google has your back…almost.Android Phone

    Google will save app data and all of your phone’s settings including Wi-Fi passwords to your Google account. When you sign in using this Google account on another phone, all of your preferences, photos (via Google+), and contacts will be imported automatically.  Be sure all the options are turned on in “Accounts & sync” in “Settings.”

    This does not include your text messages, you’ll have to back them up yourself.  Or or you can save your text messages and call logs to your Gmail account by using an app called SMS Backup+.

    To save the music, movies and other media you’ve saved on your phone’s memory card, you need to connect your phone to a PC and copy everything that’s in the micro SD card. This is a manual process so you’ll need to establish a routine for doing this.

    When it’s all said and done, it’s simpler, easier and safer to just pay for iDrive cloud storage.  Think of it like paying for insurance for your house and renting mini storage for your extra stuff.

    I hope you have found this information helpful and that you will get your files protected.  It’s really sad when computers crash and mobile devices get lost, but at least they can be replaced.  Your files cannot.  Having good backups will preserve your files and make it easy to restore them when you get new devices.

    Please share this information with your family and friends so they will be protected too.

    Enjoy!

    Mardi

  • Wait Until The Bugs Are Out!

    With new technology, it’s best to wait until the bugs have been worked out…to wait until the “early adopters” have found the major problems and the company has had a chance to fix them.  We’ve seen this recently with the release of the iPhone 6 and the Apple watch. Now, Microsoft is offering PC users the opportunity to upgrade their operating system (OS) to Windows 10 for free and people may be wondering if that is a good idea. It’s not!

    Microsoft’s wants it’s Windows 10 operating system to be installed on 1 billion devices within three years so it’s giving it away for free.  I doubt that this is going to be enough of an incentive for people to change. Even though Windows 10 will look very similar to Windows 8.1, people who use Windows 8.1 vividly remember how traumatic that change was, and will be hesitant to trust the new one. Windows 7 users are determined to avoid going through that.

    People running Windows 7 or Windows 8, should already have had an invitation to “reserve” a copy of Windows 10.

    If not, they can run Windows Update to see if any updates are available for their PC.  The one to they want is KB3035583.  This puts a small white Windows logo – the GWX, “Get Windows 10” app – in the system tray on the right hand side of the Taskbar.

    Alternatively, they should be able to find the invitation by going to Windows Update in the Control Panel (via System and Security)

    The point of “reserving” the upgrade

    The point of reserving the upgrade is to allow Microsoft to download Windows 10 – probably 4GB or more – to PCs in the background over a period of time. It doesn’t want to download the code to 400 million PCs on the same day.   Even if someone reserves Windows 10 now, they may not be invited to install it for days or weeks after the official launch on July 29.

    To cancel a reservation

    Right-click on GWX, the white Windows icon on the Taskbar, select “Check your upgrade status” and then “Cancel reservation”.

    How can People avoid Windows 10?

    Nobody is forcing people to get Windows 10. If they don’t want it, they don’t have to reserve it or install it.

    To remove the reminder, right-click on Start and select Properties. Next, go to the Taskbar tab, click the button that says “Customize …”, and find GWX, the Get Windows 10 app. The drop-down menu offers the option to “Hide icon and notifications”.

    To go further, run Windows Update and click “View update history” to see all the updates installed. Look for KB3035583, select it, and then click to uninstall or change it. Windows will ask “Are you sure?” Just click “Yes”. It will never bother you again … unless you reinstall KB3035583.

    Can they downgrade later if they don’t like it?

    Microsoft aims to enable people to “roll back” to their old operating system, if required. However, I wouldn’t rely on this.  In any case, it would be wise to backup the old system before installing a new and use the option to create “recovery media” with the old system, so that they’re not totally dependent on the “roll back” working.  Remember, you, and you alone, are responsible for preserving your own data.

    More details

    The software which will begin rolling out July 29, will be offered as a free upgrade for all Windows 7 and Windows 8.1 PC and Tablet users.  (Windows 7 and Windows 8.1 operate 74.1 percent of all devices, according to NetMarketShare.)

    Unlike Apple, who offers OS upgrades for free, the Windows free upgrade will only be available for one year…until July 29, 2016.

    For those eligible for the free upgrade, the process will only grant you a comparable version of the software. If you had Windows 7 Home, you get Windows 10 Home. If you had Windows 8.1 Pro, you get Windows 10 Pro. For those who wish to upgrade from the Home edition to the Pro edition, a Windows 10 Pro Pack will cost $99.

    Windows 10 will cost the same as its predecessor, Windows 8.  A copy of Windows 10 Home will run $119, while Windows 10 Pro will cost $199.  Copies of the software will be available online and in stores.  This option will be used by the minority of users who don’t have an eligible machine or wish to build their own computer and install Windows themselves.

  • Have you heard of Mophie?

    Have you heard of Mophie?

    It’s a compact battery that can charge almost any device.  It stores enough juice to charge two tablets at the same time… and it charges fast!

    It’s great for keeping your cell phone or laptop charged when you don’t have access to electricity.  It’s perfect for long bike rides, camping trips, and road trip adventures.

    It’s handy at home too. When your phone battery is low, (which seems like all the time) it’s nice to be able to talk on the phone while it’s charging without having to be tethered to a cord in a wall socket.  I think it charges my phone faster than a wall socket too!  I can charge my phone several times before I need to recharge “the Mophie.”  I’ve used it to charge my Chromebook also.

    There are other “battery packs” on the Market but my friend who told me about it, did very thorough research and determined that the Mophie powerstation is the best.  If you’re constantly frustrated by your gadgets running out of juice, you might want to consider getting one.

    There are smaller, less expensive models available but the Powerstation XL has the most power for the money.  Here is a link their website.

    I hope you find this tip helpful and that you will share it with your friends and family members.  Please help me to connect with all those people who could be enjoying their computers and gadgets more if they just had a little help.  Your referrals help me to “restore peace and joy in the world through computer and mobile gadget education” and are much appreciated.

    Enjoy!

    Mardi

  • Have you heard about Telikin?

    Have you heard about Telikin?

    A client asked me this recently so I looked in to it and I am impressed!  Telikin is a super easy to use touch screen computer.  It will be a great solution for many of my clients and I thought you might be interested in it for yourself or for someone you love.

    My Mother saw it in the AARP magazine a few years ago and I didn’t pay much attention because she already knew a little bit about how to use a PC laptop and I didn’t think a Telikin would be the best choice for the price.  Now that she is 93 and having some vision problems, I think the Telikin would be better for her.  Even though she is my “poster child” for what “tech resistant” elders can do, (she has hearing aids that connect to her TV and iPod with bluetooth) I think she would enjoy her computer more and use it more if she had a Telikin.  They have easy payment plans so I just may be getting her one soon.

    This week, I had an online meeting with Nancy Allegrezza, Director of Sales and wife of the inventor of Telikin.  Nancy is also a nurse, and her passion for helping seniors and providing excellent customer service is truly inspiring.

    Nancy and her husband got involved because they had aging parents with disabilities, and wanted to help them stay connected via email, photos and video chat.  There weren’t any easy computer solutions.  The Telikin computer, its apps and customer service are all designed to make everything fun and easy.  

    In my experience with clients to date, the best solution has been the iPad.  However, the screen is very small and the the apps have commands that are hard to see and sometimes hard to find.  I keep wondering why someone doesn’t come up with a better solution.
    http://telekin.com/
    Telikin may be the answer.  Everything is in large letters and the navigation buttons are clearly visible and well labeled.  There is nothing to open or close, you just touch the big buttons on the screen and you are where you want to be!  The price is just about right, too – $699 isn’t a lot to pay vs. a $599 for a Mac Mini without a monitor.  

    You can try a Telikin for two months and get your money back if you don’t like it.  They provide VIP tech support (including remote access) to ensure that you have a good experience right from the beginning.  And it has a “tech buddie” feature so a trusted friend or relative, anywhere, can access your computer remotely and help whenever you want.

    I’d love to know what you think about it.  Do you think you might be interested in getting one?  Do you know someone who might like one?

    Click here to see a video and learn more about the features and benefits and let me know what you think.

    Looking forward to hearing from you!

    In joy,

    Mardi
    “Helping people enjoy the many benefits of modern technology is my passion”

    P.S.  Feel free to forward this to anyone you think might be interested.